Our 4 Favorite Homeschooling Resources
July 24th, 2015 | 4 min. read

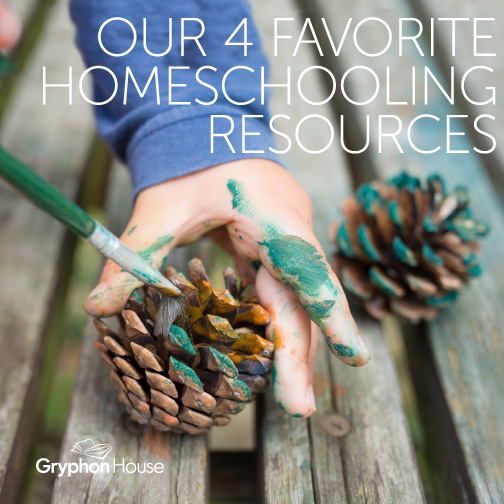
We frequently get questions about the benefits of homeschooling, how does homeschooling work and a list of the best homeschool activities. Luckily for homeschool families, Gryphon House has hundreds of homeschool activities that teach core concepts and even promote socialization for homeschoolers.
In Everyday Discoveries: Amazingly Easy Science and Math Using Stuff You Already Have, author Sharon MacDonald offers fun ways to get your homeschooled preschooler learning.
Below are 4 of our favorite homeschooling resources from her fascinating book.
Finding the Plastic Worm
You Need
- 2-liter soda bottle
- top soil to fill 3/4 of bottle
- long rubber fishing worm
- hot glue gun
- magnifying glass
- magnet
- prism
- stethoscope
- tray
Activity
- Before the children arrive, put the soil and the worm in the bottle. Use the hot glue gun (adults only) to secure the cap to the bottle. Put the tools on the tray.
- Challenge the children to find the worm in the bottle by using the tools on the tray and encourage them to discuss which tool would be the best.
- Have them try each of the tools to see which would be the most helpful. Talk about what birds use to find worms.
Questions you might ask
- Was the stethoscope helpful? Why or why not?
- Why do you think we sometimes say "he has an eagle eye?"
Extension
- Compare bottle filled with the worm and soil to a bottle filled with birdseed and soil. Talk about which would be easier for a bird to find.
Modifications for younger children
- Let them explore the bottle without tools (until the newness wears off) and then introduce one or two of the tools.
More challenging for older children
- Ask the children to generate a list of other tools that might be helpful in finding worms.
The Crayon Muffin Meltdown
You need
- a bucket of old, peeled crayons (discard the brown, black and purple colors)
- old muffin tin
- oven, preheated to 275 degrees F
Activity
- The children break the old crayons into small pieces and place the same color crayons in each of the muffin tin cups.
- Fill the cups, but not above the edge.
- the children will discover what happens when the crayons are melted and then cooled. This can be done as a group or individually.
- State the Problem or Question:What will happen when we melt the broken crayons and let them cool?
- State the Hypothesis: We believe _____ and ________will happen when broken crayons are heated in the oven and then allowed to cool.
- Method of Research: We will place the muffin tin filled with broken crayons in a preheated oven at 275 degrees F for fifteen minutes. We will let the muffin tin cool and then see the results.
- Checking the Hypothesis: We will look at our hypothesis and see if we were correct.
- Results: We found that the crayons melted and that, when cooled, they were transformed into crayon muffins we could __________with.
Questions you might ask
- What happened to the crayon pieces?
- What can you do with crayon muffins?
Extension
- Draw pictures with the crayon muffins.
Modifications for younger children
- Take the crayon pieces out of the oven every five minutes so they can observe the changes. Make sure the children know that the oven and muffin tin are very hot and not to touch either one.
More challenging for older children
- Do the same activity, but mix the colors in the cups of the muffin tin.
One-Fourth of an Aged Potato
You need
- an aged potato (about 2-3 weeks old)
- knife
- 4 tires filled with soil (or other container filled with soil)
- trowel
- watering can
- paper towels
- chart tablet and marker
Activity
- Cut the potato into fourths, making sure that each quarter has at least one potato eye.
- Set potato quarters on paper towels for 1-2 days to dry.
- Plant one potato quarter in each of the four tires or other containers.
- Water them when the soil feels dry 3 inches from the surface.
State the Problem or Question
- What will happen if we plant a part of a potato in soil?
State the Hypothesis
- Each child predicts what will happen when we plant a quarter of the potato. Write their predictions on a chart.
Method of Research
- We will plant one-fourth of a potato in four different tires and record our observations every week. We will water the soil when it is dry. In 80-90 days, when the plant that appeared on the soil surface has died, we will dig up the roots and examin them.
Checking the Hypothesis
- We will look at our predictions and see if we were correct.
Results
- We found that _______ when we planted a fourth of a potato soil in four separate tires.
Extension
- Plant and grow other plants like beets, carrots, turnips, and radishes.
Modifications for younger children
- Let children have their own plants to grow and watch.
More challenging for older children
- Kee a calendar record of the changes in the potato growth.
Icebergs in Cups
You Need
- 16 oz. plastic cup for each child
- 5 oz. wax-coated paper cup for each child
- water
- tray
- clothespins (optional)
- mittens, gloves, or hot pads (optional)
- apple, grape, or orange juice
- freezer
Activity
- With help from the children, fill the plastic 16-oz. cups and the smaller 5-oz. paper cups 3/4 full of water.
- Slide the smaller cup down into the plastic cup. Do this with each child. Note: If you want the smaller cup to sit squarely inside the larger cup when both are filled with water, use clothespins and attach them on the opposing four sides of the larger cup. The clothespins force the smaller cup to "stand off" from the sides of the larger cup, keeping the small cup in the center of the large one (this allows the water to freeze evenly, making a uniform ice cup with the sides of more-or-less equal thickness).
- Place all the cups on a tray and put them into the freezer. Leave them about three hours (each freezer is different, so check them every hour to see if the water in the smaller cup is frozen).
- Pull out the tray of cups and let them sit for five minutes.
- Pull out the small cup from inside the larger one. What you will have left is a partial ice cup frozen inside the larger plastic cup.
- Place the small cup cubes in the pouring table and add water for the children to explore.
- Let the children examine their partially frozen ice cups (inside the plastic cups). Pour off about half the excess water that has not frozen. Refreeze the cup for use the following day.
- Retrieve the ice cups from the freezer the next day. Pour in juices and let the children have an icy drink. Use mittens or hot pads if needed. Very messy, but exciting.
Extension
- Do this with several types of juice and graph the children's juice preferences.
Modifications for younger children
- Put masking tape on the cups to make them easier to hold (as the ice melts, the outside of the cups get slippery).
More challenging for older children
- Encourage the children to draw pictures showing teh steps they followed in the ice cup activity and add words (by using invented spelling or dictating the story to you).
For more great activities for homeschool families, check out Everyday Discoveries by Sharon MacDonald.
Author(s)Sharon MacDonald
Topics: